Automation is the key to scaling your marketing and improving customer engagement. In Zoho Campaigns, workflows allow you to automate repetitive tasks, guide customers through personalized journeys, and improve productivity.
This guide will teach you how to create an automated workflow, explain all its components, and help you activate it successfully.
What is a Workflow?
A workflow is an automation tool that lets you create unique processes based on your business needs. Using workflows, you can design multiple paths for your contacts based on conditions and actions at each step.
In Zoho Campaigns, there are six types of workflow series:
- Welcome & Onboarding Series – Introduce new subscribers.
- Nurture Series – Educate and engage leads over time.
- Re-engagement – Win back inactive contacts.
- Customer Retention – Retain loyal customers.
- E-commerce Workflows – Automate cart recovery, purchase follow-ups, etc.
- Conditional Workflows – Customize actions based on specific conditions.
Components of a Workflow
A workflow has three main sections:
1. Trigger
Triggers start the workflow automatically.
Zoho Campaigns supports:
- Form Submission
- List Entry
- Email Action
- Field Update
- Open Trigger
- Tag Assigned / Removed
- Abandoned Cart
- Purchase Follow-up
- Enter a Segment
- Date-field Trigger
- Cyclic Trigger
Tip: Choose the trigger that aligns with your workflow goal. For example, Use form Submission triggers when a visitor fills out a form on your website, landing page, or signup page.
2. Process
The Process section controls how contacts move through the workflow.
It has Flow Control components:
- Random Split – Send contacts down multiple paths randomly.
- Merge – Combine multiple workflow paths back into one.
And Conditional Components:
- Simple Condition – Define a single condition for contacts to meet.
- Multiple Conditions – Set several criteria for branching paths.
- Email Activity – Continue workflow based on email engagement (opens, clicks, etc.)
Tip: Use conditions to make your workflow smarter and more personalized.
3. Actions
Actions define what happens to your contacts at different points in the workflow. Once a contact reaches an action block, Zoho Campaigns performs the task automatically.
Below are the key actions you can use in your automated workflow:
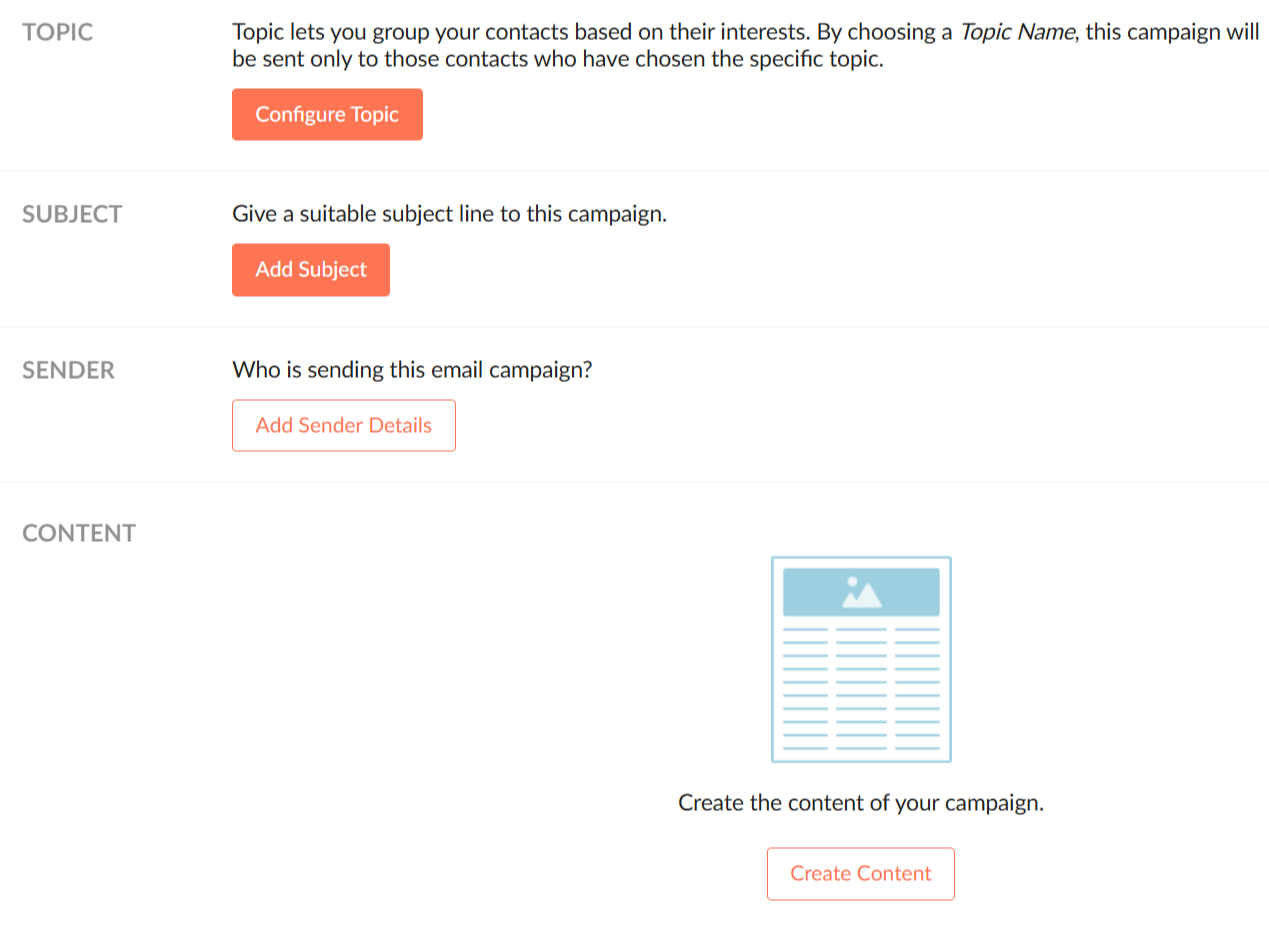
Send Email
This action allows you to send an email to your contacts when they reach a specific stage in your workflow.
How it works:
- Drag and drop the Send Email component into the workflow.
- Create or select an email message.
- Add a subject line, sender details, and content.
- Submit for compliance review.
- Once approved, the email will be delivered based on your workflow schedule.
Tip: Use targeted topics and personalization tags to increase engagement and relevance.
Send SMS
The Send SMS action lets you send personalized text messages to contacts in your workflow.
How it works:
- Drag the Send SMS component into the canvas.
- Select your SMS gateway.
- Write your message and add merge tags.
- Choose your contacts’ phone number and country fields.
- Submit for review.
Tip: Keep your SMS content short and clear. Use it for reminders, alerts, or quick updates.
Send Tags
Tags help you categorize and segment your contacts as they progress through different stages of your workflow.
How it works:
- Drag the Add Tag component into your workflow.
- Choose an existing tag or create a new one.
- Apply the tag to contacts who reach this step.
Tip: Tags make it easier to identify where a contact is in your customer journey—for example, “Engaged Lead,” “Needs Follow-Up,” or “Completed Journey.”
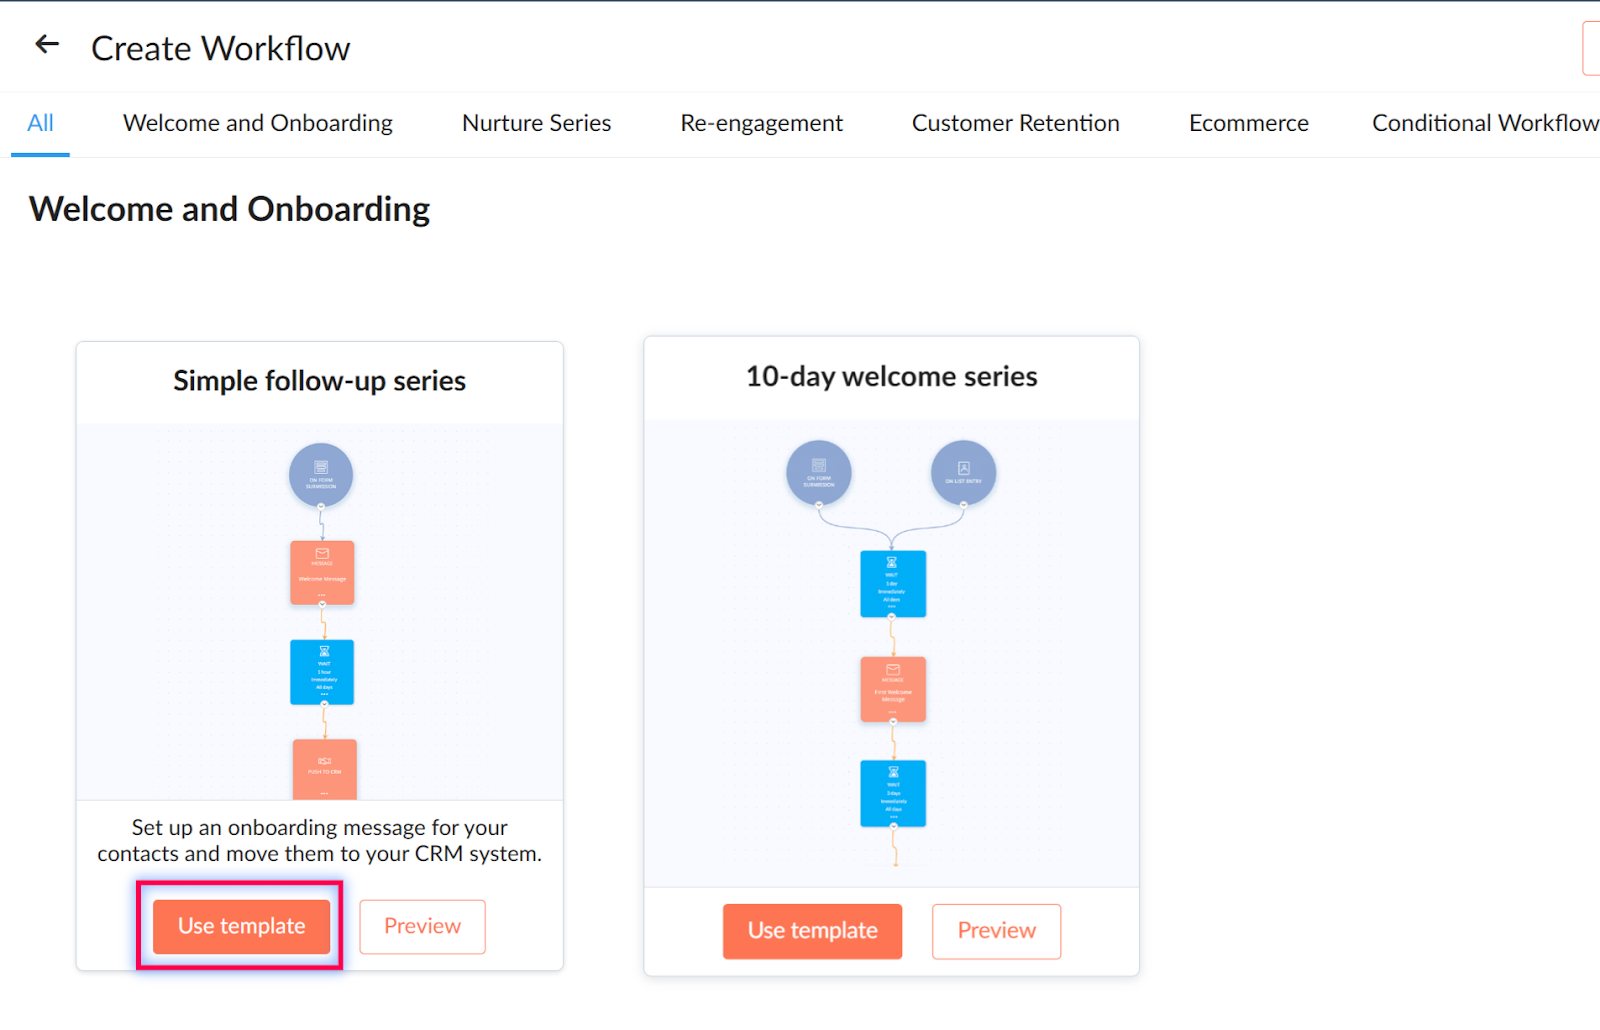
Creating A Workflow Using Template
Templates are the easiest way to get started. They include all components already laid out:
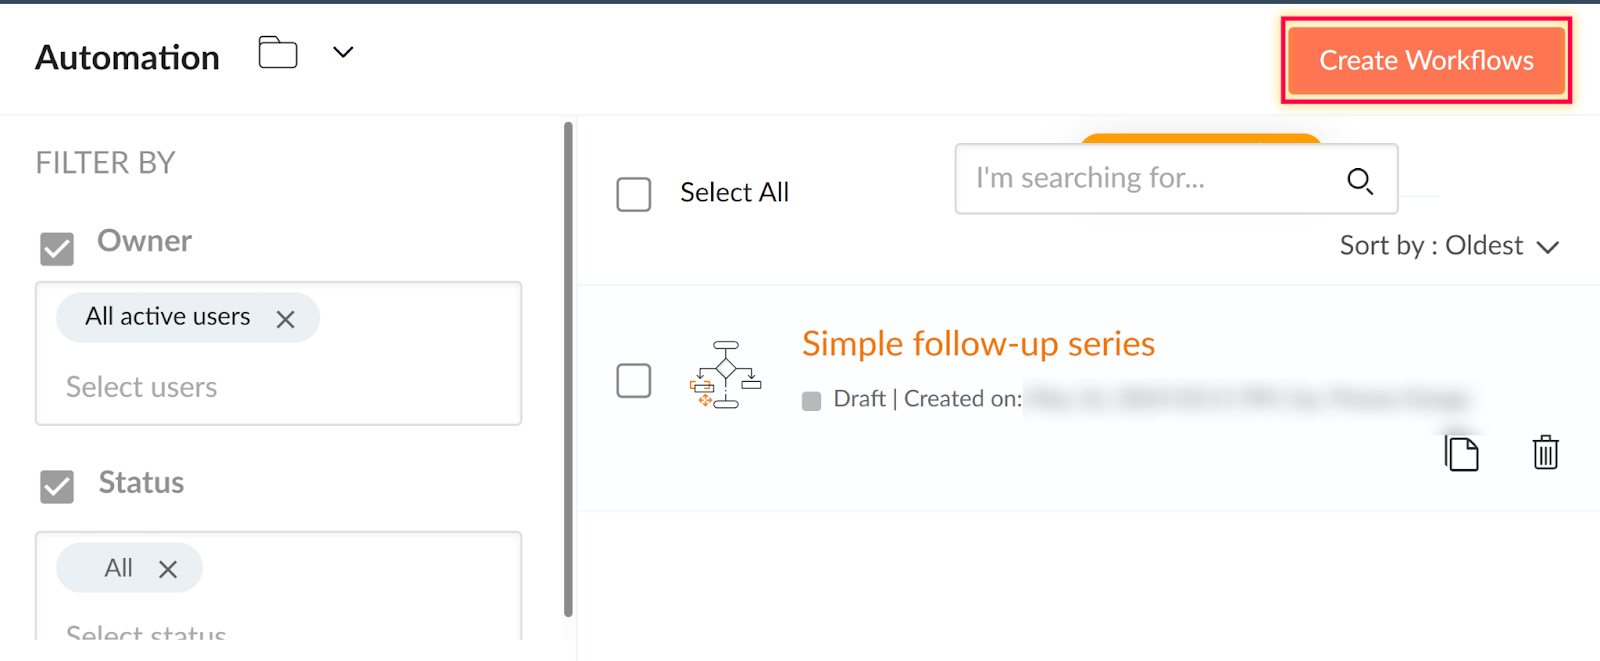
Go to Automation → Create Workflow
Choose a Template (e.g., Welcome Series)
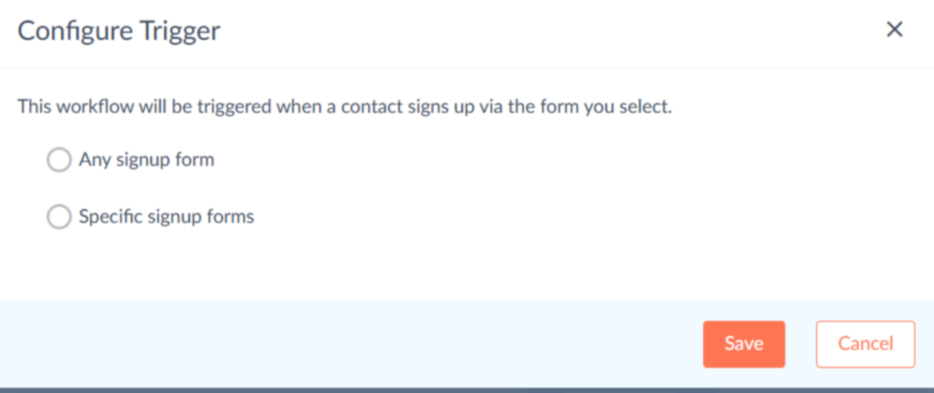
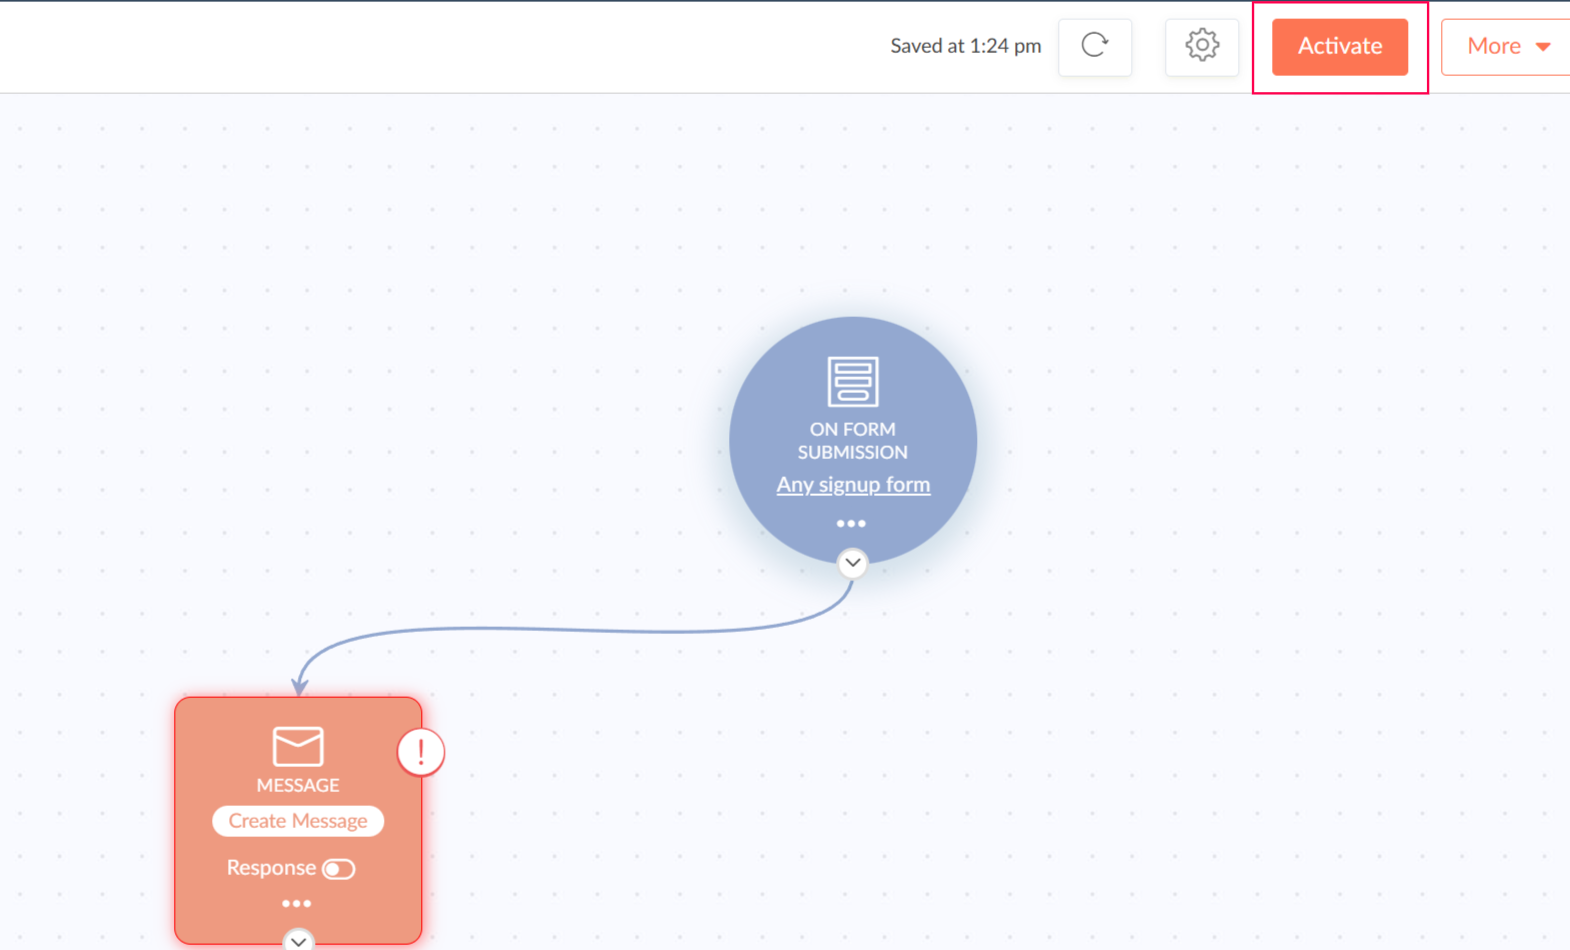
Add a Trigger (Form Submission, List Entry, etc.) -To trigger the process, click on the form submission.

Select the form that will trigger this—either any form or a specific one. This is the entry point to your workflow. Any submissions from your form will enter the workflow.
Next you'll want to create each message in your workflow. Click 'Create Message' on each message section in your workflow.

and build out your content, similar to a once off email campaign
You can add additional actions or processes to your workflow. Make it as simple or complex as you need.
Once you have completed your workflow you are ready to activate!
Tips for Effective Workflows
- Keep triggers aligned with business goals.
- Use Random Splits and conditions to make workflows smarter and more personalized.
- Test workflows before activating.
- Use tags to track progress and engagement.
- Combine email, SMS, and CRM actions for complete automation.
